Why nostr?!
Because it is simple.
And by that I mean the base layer is simple. There is no black magic that needs to happen to get admitted, synced and discovered.
At its core, it goes something like this:
- Set up a server.
- Start putting content there.
- Point people to your server to find your content.
- They know it's you because you signed your content with a key.
Of course, apart from 4, that's not really that different of a description from any communications infrastructure anyone would use.
I understand that many think 4 is a big deal. But let's face it; most people couldn't care less about their digital sovereignity. The vast majority of crypto holders defer to others to keep their key safe, one way or another. It is a big deal because you can, but not because people do.
However, for those who do care, who want to take responsiblity, nostr offers some things I haven't seen in any other project of its kind so far:
- The core protocol is a couple of pages, elegant and simple, and expressed in clear language.
- I can easily execute that same protocol with the most basic of tools.
- There exists server software that is easy to build, easy to set up and that does not require much resources to run.
- "It does not rely on P2P techniques, and therefore it works."
In other words. To do something with nostr does not involve connecting to some infernal machine that abstracts all its complexity. It is in itself not complex.
It is simple.
I hope this post works as a demonstration of that.
At the time of writing I am using:
- linux 6.12.10
- python 3.13.1
- rust 1.81 (2dbb1af80 2024-08-20)
All rust applications below are built simply with cargo build --release.
The message
Please meet the script that will generate our scratch nostr message. All it took to write it was to read through the first "Nostr Improvement Proposal" (NIP-01). [1]
# msg.py
import coincurve
import json
import time
import hashlib
import string


# generate secret for private key
h = hashlib.sha256()
h.update(b"foo")
k = h.digest()

# create private and public keys
pk = coincurve.PrivateKey(k)
pubk = pk.public_key_xonly.format().hex()

# create the unsigned message data with the current timestamp
t = int(time.time())
msg = [
    0,
    pubk,
    t,
    1,
    [],
    u"hello nostr \u00b6",
        ]
v = json.dumps(msg, ensure_ascii=False, separators=(',',':'))

# calculate the signature over the digest of the unsigned message
h = hashlib.sha256()
h.update(v.encode("utf-8"))
z = h.digest()
sig = pk.sign_schnorr(z)

# assemble and output the message to be published, adding the digest and the signature
payload = {
    "id": z.hex(),
    "pubkey": msg[1],
    "created_at": msg[2],
    "kind": msg[3],
    "tags": msg[4],
    "content": msg[5],
    "sig": sig.hex(),
        }
cmd = [
        "EVENT",
        payload,
        ]
print(json.dumps(cmd, ensure_ascii=False))
To run the script, you will need the coincurve python module. As always, a virtual environment is recommended as usual, while you are playing around:
$ python -m venv .venv
$ source .venv/bin/activate
# let's install bech32, too, we will need it later
$ pip install coincurve bech32
$ python msg.py
Once run, the script will produce the signed message ready to be sent to the relay.
It will resemble the data below, but with a different value for the created_at, which in turn results in different values for id and sig.
["EVENT", {"id": "63b43ae8d74b5df17659a4663f256c6829994970ca6b08a5d068e0c01a460461", "pubkey": "cc9519ba6fb1cb0cca53743dc90c2418440cf637f8b891ce2f0e2dc5c5b3cf01", "created_at": 1738407317, "kind": 1, "tags": [], "content": "hello nostr ¶", "sig": "c2ccf3524908c54a53e5fc1405b56b514dcf1d80baa7c135514fce3dcafb6646920c560f612e3769d2682b318f44f880c7147cb810ca88ffea0496cda087c583"}]
The runnning
To share this with the world we need some service to read and write from.
Starting out I am using the nostr-rs-relay (v0.9.0, git:ff65ec2acd781150a585a78e1c60b0cdb104698e). It gives you enough debug output to follow what's going on, and it's easy to build [2] and configure:
# nostr-rs-relay configuration toml file
# limited to the fields that should be changed

[info]
relay_url = "ws://localhost"
name = "my_first_nostr_node"
description = "act local, think local"
# same pubkey as the script above
pubkey = cc9519ba6fb1cb0cca53743dc90c2418440cf637f8b891ce2f0e2dc5c5b3cf01

[network]
bind = 127.0.0.1
port = 8081
In the repository, make a new directory db and run it. The process starts a websocket server which is used to send and receive events. One of the log lines in the terminal should show you where it is listening.
$ RUST_LOG=debug ./target/release/nostr-rs-relay -c config.toml -d db
[...]
2025-02-01T11:05:55.223024Z  INFO nostr_rs_relay::server: listening on: 127.0.0.1:8081
The sending
We use websocat (v1.14.0, git:83c4375ac9a0475b7a8f3b75e49290f4486a4914) to provide the terminal connection to the node.
Add a bit of fanciness by piping the output of our message generator python script to the command:
$  python msg.py  | tee /dev/stderr | websocat -v ws://localhost:8080
[INFO  websocat::lints] Auto-inserting the line mode
[INFO  websocat::stdio_threaded_peer] get_stdio_peer (threaded)
[INFO  websocat::ws_client_peer] get_ws_client_peer
["EVENT", {"id": "bac1d459b39ac0ba91951491e382b8b5648b149b509ea8585a369d0a84101447", "pubkey": "cc9519ba6fb1cb0cca53743dc90c2418440cf637f8b891ce2f0e2dc5c5b3cf01", "created_at": 1738408544, "kind": 1, "tags": [], "content": "hello nostr ¶", "sig": "322470a022f21fe4eae6b3652f4cca59a71d2e865791880117aba7bdb069bfed8780eea7874e0d475db71beef4c498b5a559bb4dd3ef87ecce68f157a7b64213"}]
[INFO  websocat::net_peer] Failure during connecting TCP: Connection refused (os error 111)
[INFO  websocat::net_peer] Connected to TCP 127.0.0.1:8081
[INFO  websocat::ws_client_peer] Connected to ws
["OK","bac1d459b39ac0ba91951491e382b8b5648b149b509ea8585a369d0a84101447",true,""]
[INFO  websocat::sessionserve] Forward finished
[INFO  websocat::ws_peer] incoming None
[INFO  websocat::sessionserve] Reverse finished
[INFO  websocat::sessionserve] Both directions finished
As we see, the response from the node (the line with "OK" as first value) indicates a success, and cites the id matching the id in the message json contents we emitted to stderr.
The message has now been published.
The viewing
Of course we can use a similar trick to get the message back out. More on that a bit later.
But for now, let's use a proper nostr client to view the published message.
My introduction to nostr has been through gossip (v0.13.0, git:90712385f6f79b60c01ae588464be4c960e76836), a rust-based graphical client with plenty of levers to pull, aswell as an easy way of running clients with different states and keys simultaneously.
The only annoying thing about gossip I have found so far is that it will not accept localhost as a value when adding relays to use. So we will use our local hostname instead. Make sure you have an entry in your /etc/hosts and that it resolves:
$ cat /etc/hosts
[...]
127.0.0.1       localhost       myhost

$ getent ahostsv4 myhost
127.0.0.1       STREAM localhost
[...]
Once built, create an empty data directory, and run gossip on it:
$ mkdir foo
$ RUST_LOG=debug GOSSIP_DIR=foo ./target/release/gossip
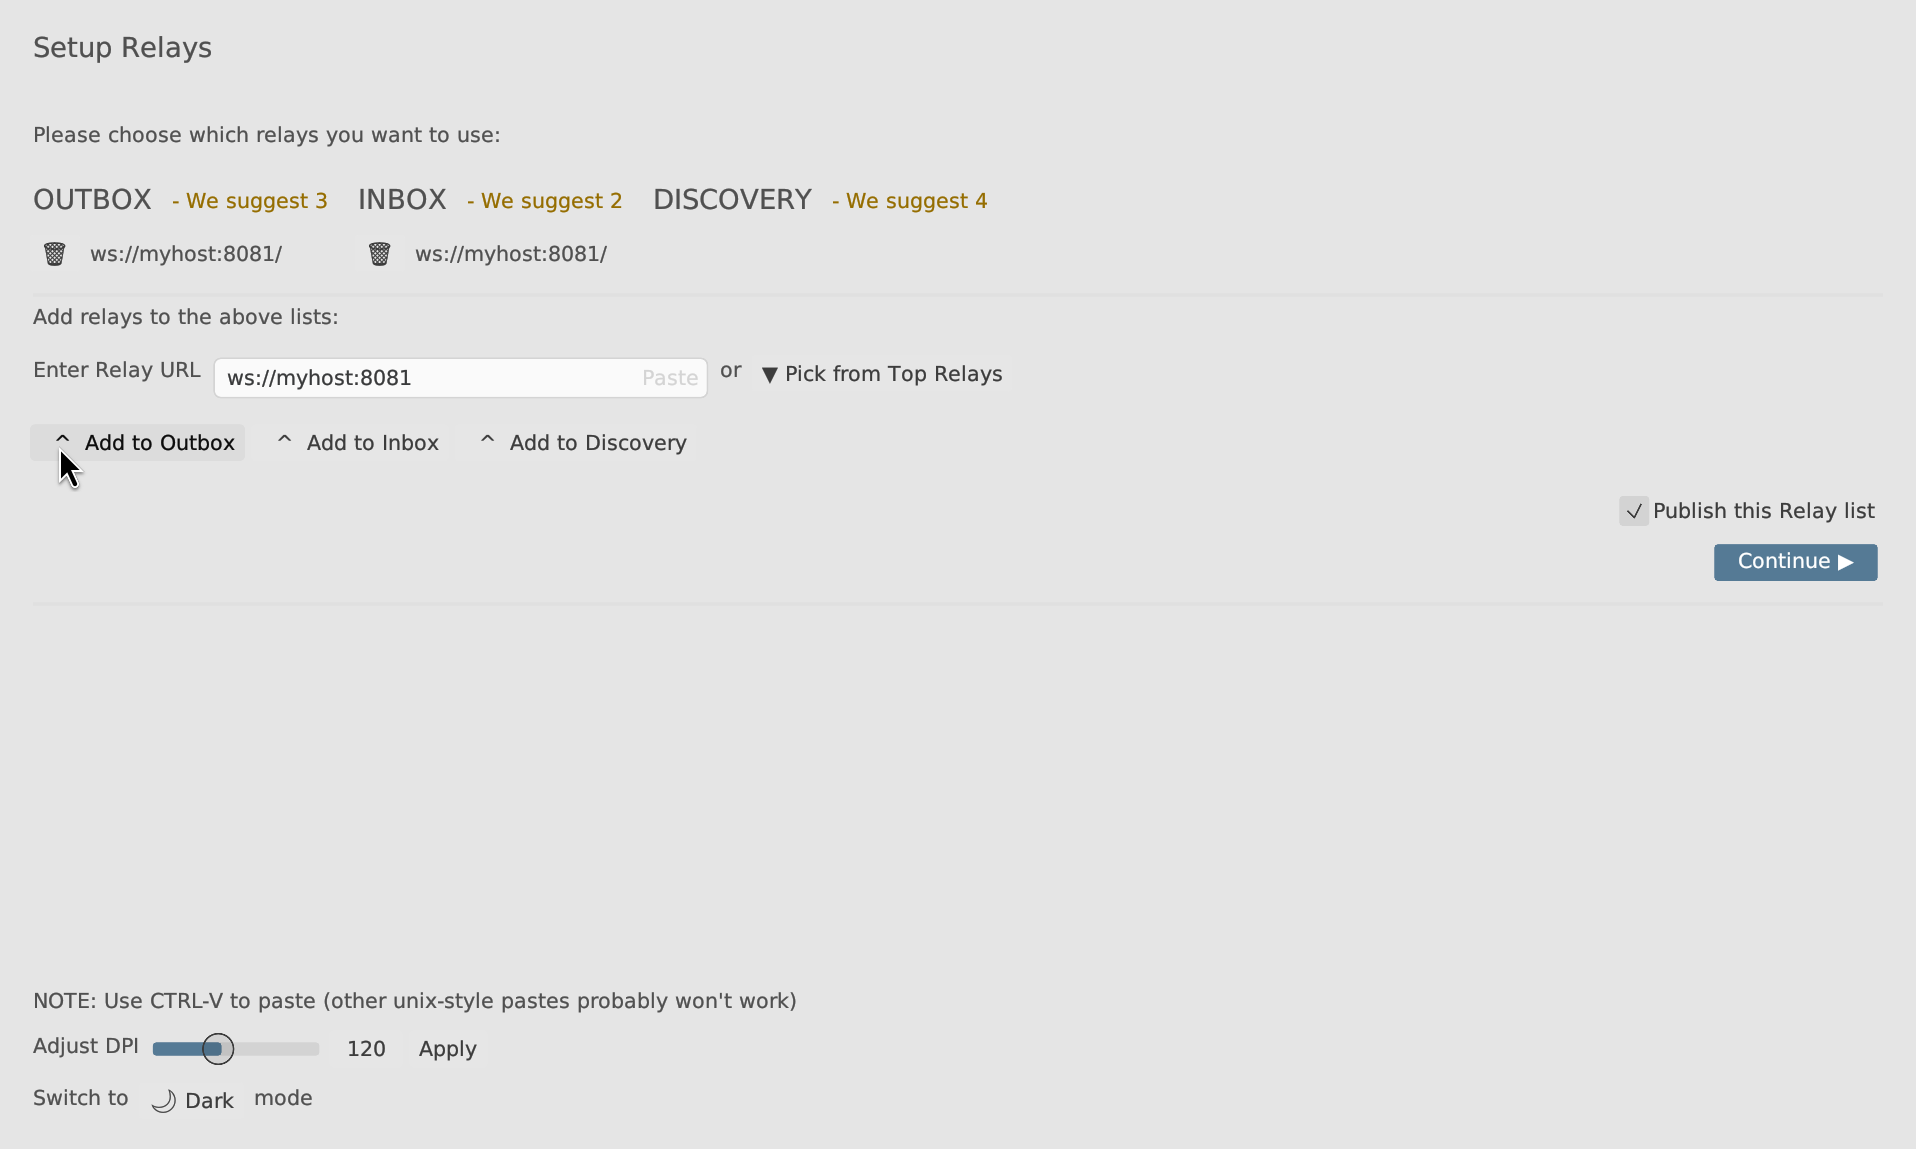
You will go through a setup wizard, prompting you to create a new account, and then ask you for relays to use and people to follow.
On the relay page, remove the one suggested and add instead ws://myhost:8081 to the Outbox and InBox categories.
On the follow page, follow the public key of the message we already have published: cc9519ba6fb1cb0cca53743dc90c2418440cf637f8b891ce2f0e2dc5c5b3cf01. [3]
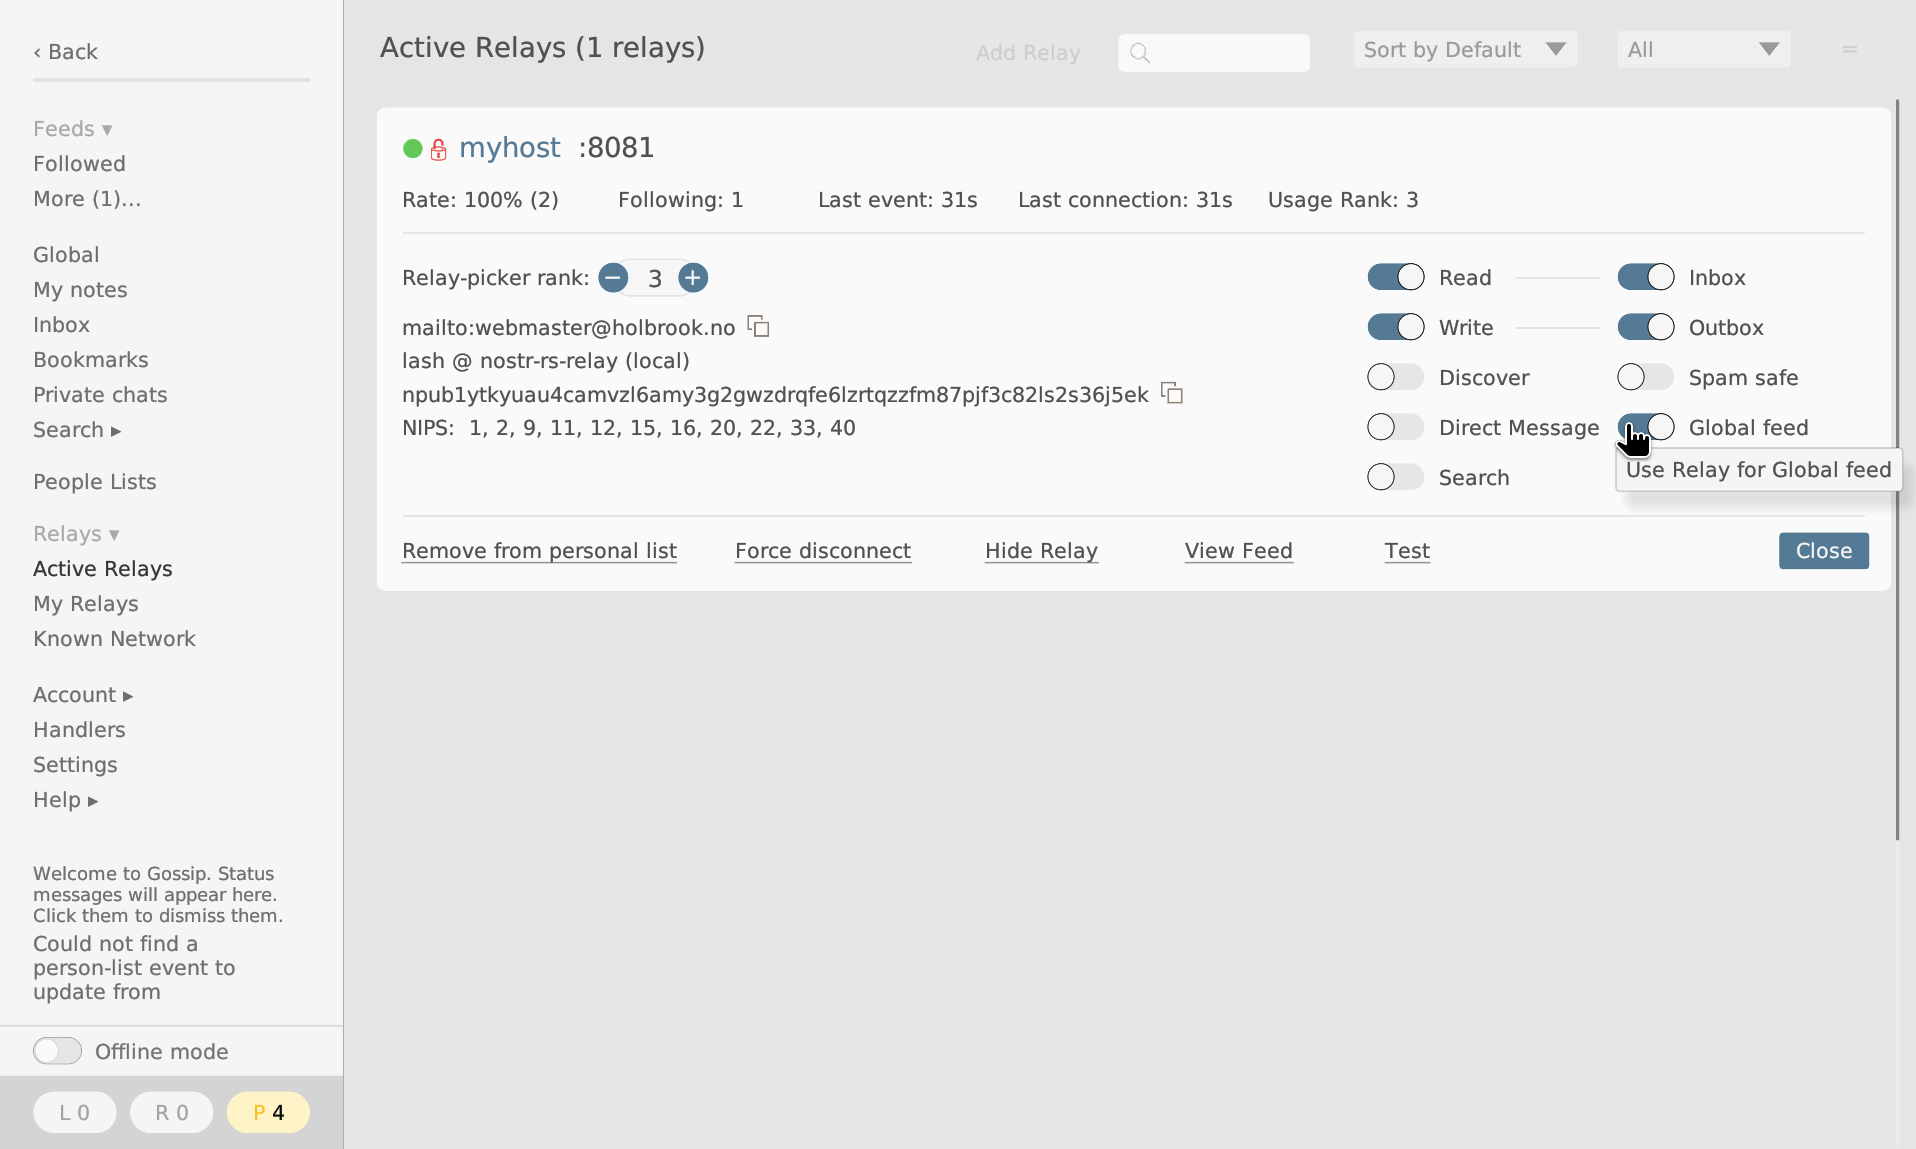
Completing this step will take you to the main application page. Here, navigate to Relays -> My relays, which should list the one relay added using the wizard. Expand the entry, activate the Global Feed switch.
Navigate back to the Global menu item. In a short while, the post made with the script should appear [4].
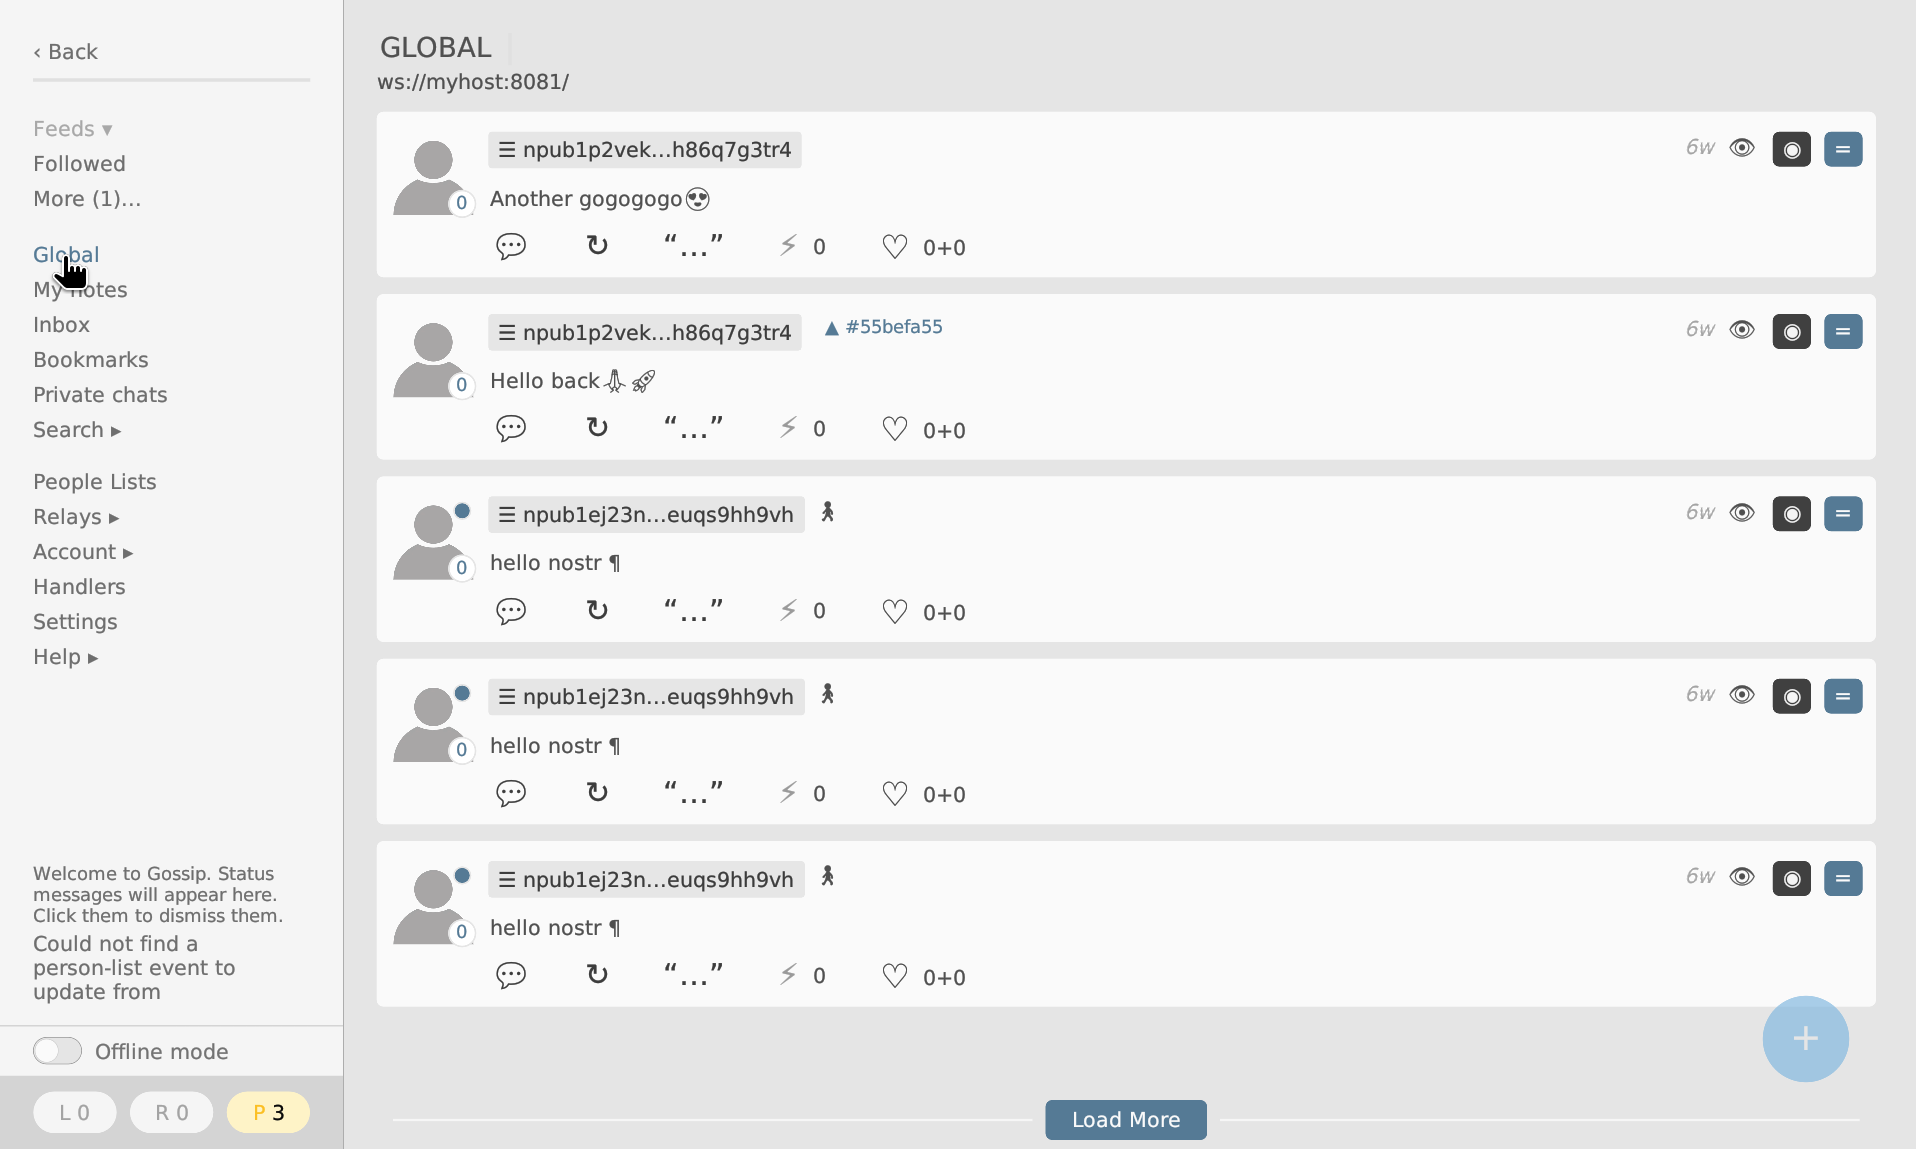
With any luck, it should appear under the Following menu item, too.
Getting hooked
Let us now read a response from the gossip client directly in the websocket connection.
While in gossip, click the reply button on the post, write a message and send it.
Then, choose the menu item Settings and copy the value in the Public Key entry (starts with npub...)
Back in the terminal, using a new script, we will now generate a subscription request for text message events signed with this public key.
# sub.py
import sys
import bech32
import coincurve
import json
import hashlib
import string
import os

# parse public key from input
if len(sys.argv) == 1:
    raise ValueError("need single argument")
r = bech32.bech32_decode(sys.argv[1])
if r[0] == None:
    raise ValueError("Invalid npub key {}".format(sys.argv[1]))

# Can't use bech32.decode() directly because there is a data length check there that will always fail with nostr public keys.
# I guess the module was written with 160 bit bitcoin addresses in mind.
# So we manually have to convert the bits as in the function.
pubk_bytes = bytes(r[1])
pubk_v = bech32.convertbits(pubk_bytes, 5, 8)[:-1]
pubk_bytes = bytes(pubk_v)
pubk_object = coincurve.PublicKeyXOnly(pubk_bytes)
pubk = pubk_object.format().hex()

sub = os.urandom(32).hex()
cmd = [
    "REQ",
    sub,
    {
        "authors": [pubk],
        "kinds": [1],
        }
        ]
print(json.dumps(cmd))
For the public key npub1p2vekljvajp4d3kqdwvha54d6ywh2j360xpl32ug70r8y009h86q7g3tr4 we would do:
$ python sub.py npub1p2vekljvajp4d3kqdwvha54d6ywh2j360xpl32ug70r8y009h86q7g3tr4 | tee /dev/stderr | websocat ws://alto:8081
["REQ", "2c626a2ee46a1751b271447264b1eb524b4ed0f834d35a94d3d74d21ed003fde", {"authors": ["0a999b7e4cec8356c6c06b997ed2add11d754a3a7983f8ab88f3c6723de5b9f4"], "kinds": [1]}]
["EVENT","873a3ce558e0690c4d831bea2c74b24f40407ef2bc42e251792c0bf80e94eb28",{"id":"b1474751a1799c4785aa8272fba5f20034abe3312d38335ae5553c95045e03b3","pubkey":"0a999b7e4cec8356c6c06b997ed2add11d754a3a7983f8ab88f3c6723de5b9f4","created_at":1738415174,"kind":1,"tags":[["p","cc9519ba6fb1cb0cca53743dc90c2418440cf637f8b891ce2f0e2dc5c5b3cf01"],["e","55befa55c97b59fb4f206455246c6d14f0711c429502dc814036fd271a544ea6","ws://alto:8081/","root","cc9519ba6fb1cb0cca53743dc90c2418440cf637f8b891ce2f0e2dc5c5b3cf01"]],"content":"Hello back🙏🚀","sig":"1288e42970e746e6908350e434db27e408b40ff0290e7d54e32740a5dd6ceeca74cea410694eb5f1347099372fb2fdf8d58369c565fe2cc57a64be49c05dfa75"}]
["EOSE","873a3ce558e0690c4d831bea2c74b24f40407ef2bc42e251792c0bf80e94eb28"]
And of course, while this connection is kept open, any other messages posted by the same key will appear in the terminal.
[1] To be fair, in reality NIP-10 also, which is referenced by NIP-01, although the meat of it is already spelled out in the latter.
[2] Simply cargo build --release. If you are using the rustup toolchain manager, you can set up provisions with rustup default 1.81 first.
[3] The public key will be encoded to the nostr npub encoding scheme, a bech32 encoded address. It's really just semantics, and represents the same value. Have a look at python_nostr.
[4] The synchronization logic in gossip still seems to be slightly lazy, so you may have to move back and forth between menu items to trigger redraws that will list the message.